

Woodworking and Carpentry
Working with wood has been a hobby of mine since I was a kid. I put together my first night stand table when I was about 8 years old. My shop got a significant upgrade when I moved to the Chicago area from Tucson in 2009. Here are some of my biggest and favorite projects.
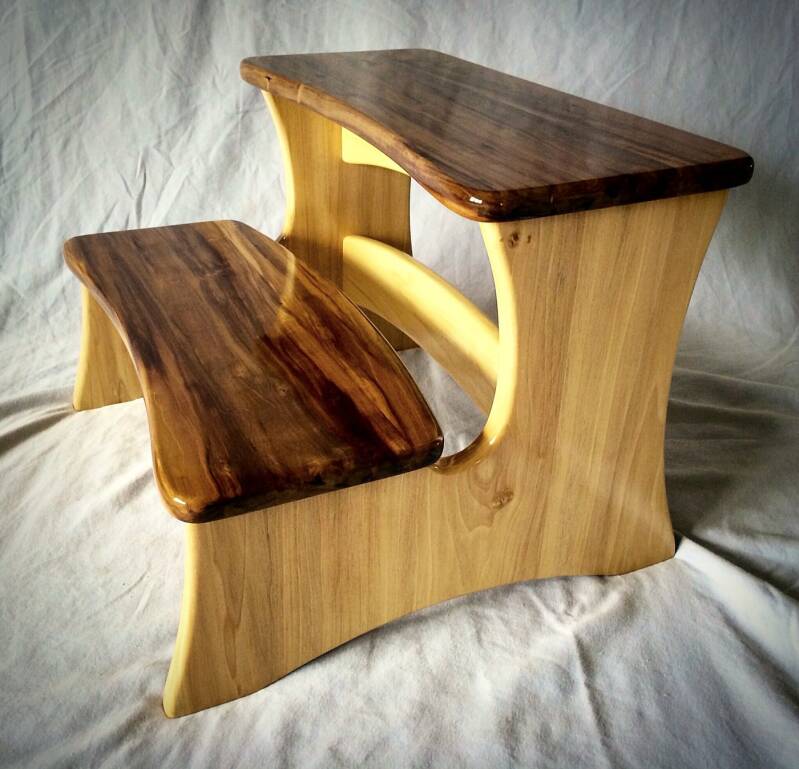
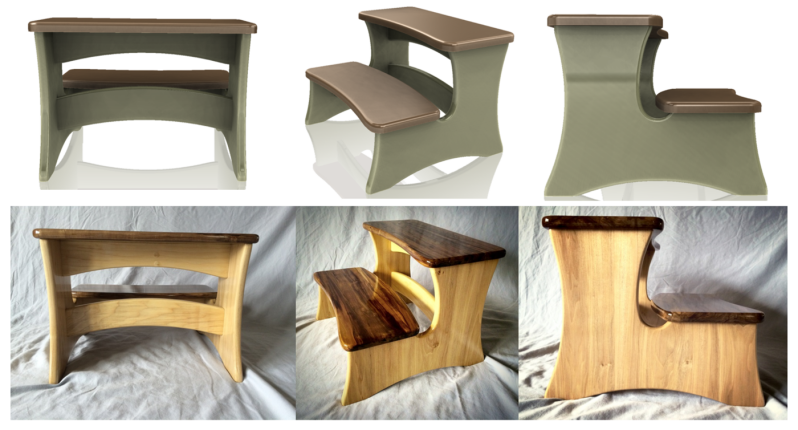
2-Step Stool
Poplar
After making simpler stools for my first child, I took on a more challenging project when my second child was born. This stool was inspired by the curves of the lens project I was working on at the time.
The sides and braces are definitely poplar, I am less sure about the tops. They were identified as poplar, but they are very unique and beautiful. Part of the fun of working with poplar is hunting for the best pieces of wood with interesting grain and color (not the green ones).
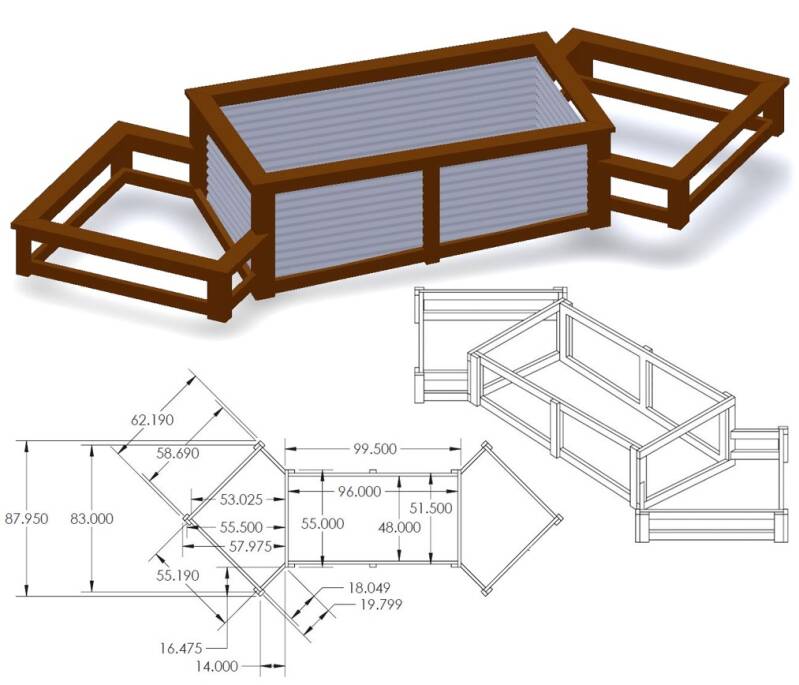
3-Tier Raised Garden
Cedar and corrugated steel
My goal with this project was to make a garden that was attractive to look at; one that is a feature of the landscape rather than an ugly rectangle of dirt on the ground. I did this by adding two small beds on the ends of a higher rectangular section. I didn't want to level the ground for this project (much to the amusement of my contractor friends). The garden looks much nicer by conforming to the topography of the landscape rather than by forcing a level section of the yard.
Under the garden is a layer of gravel with a perimeter French drain. The gravel and drain are topped with a metal mesh to prevent rodents from digging under. Each of the three beds has a water supply that I turn on the spring and can be used to run a drip system. This is so much better than dragging a hose over to the garden once a day.
Key to the long life of the cedar is to keep moist soil from sitting up against it. The corrugated steel does this nicely and along the bottom edges and corners I used food-grade plastic to keep the soil off of the wood. It is working! After more than 6 years there are zero signs of rot.
I designed the structure in Solidworks to make it much easier to determine the length of all the boards and the angles to cut them at.


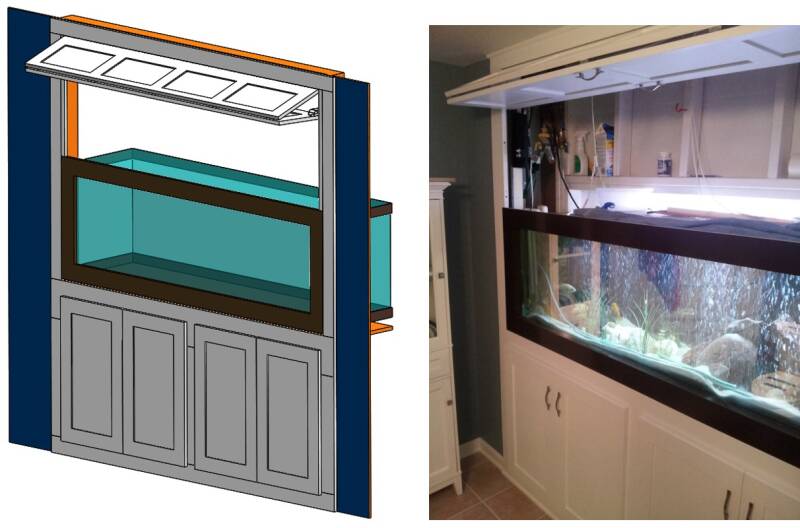
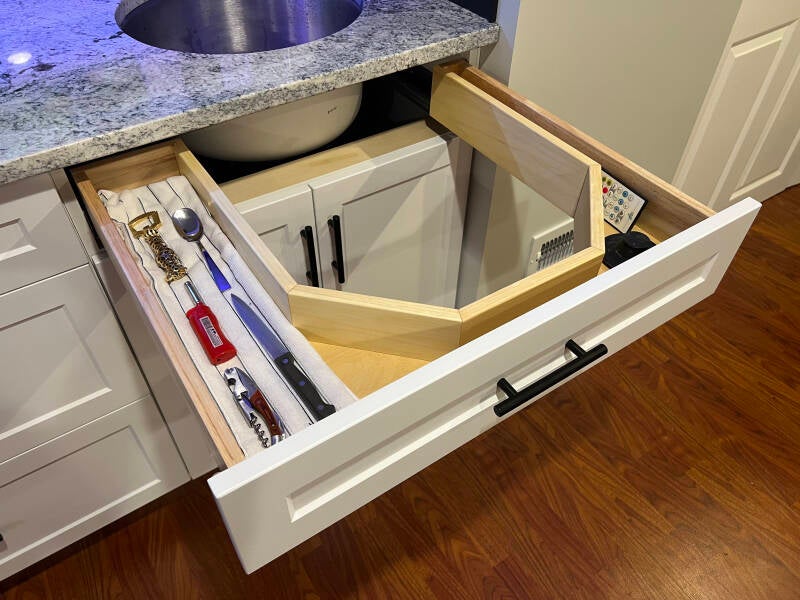
Basement Bathroom with Fish Tank
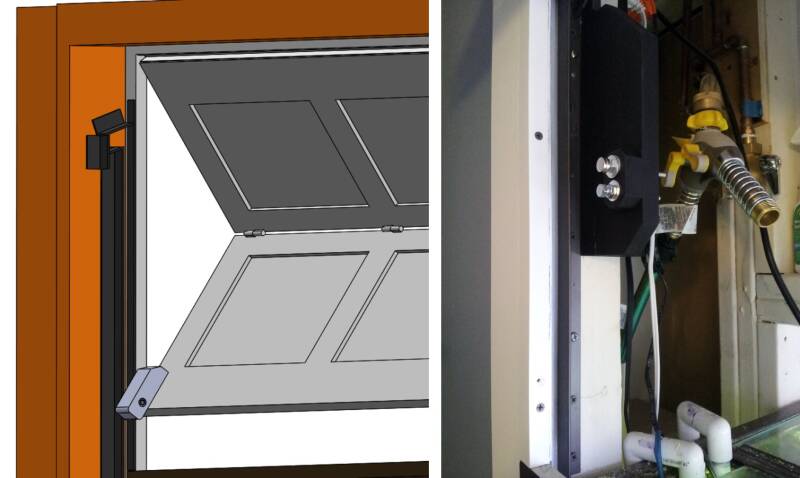
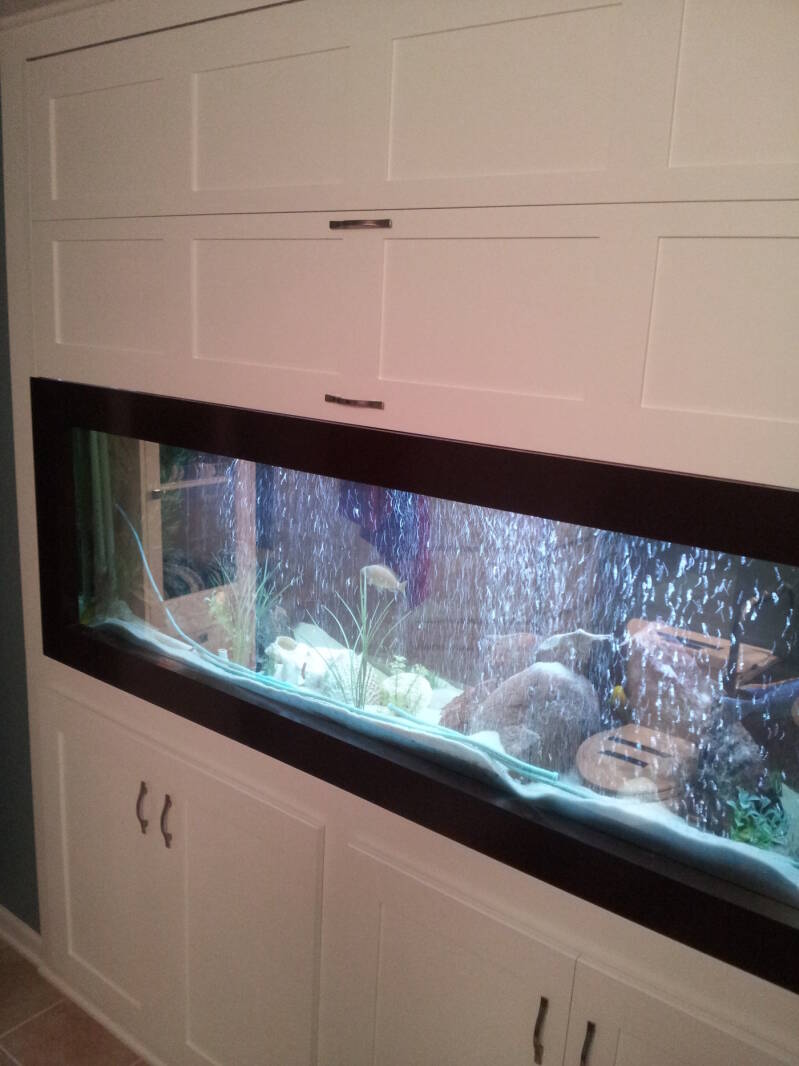
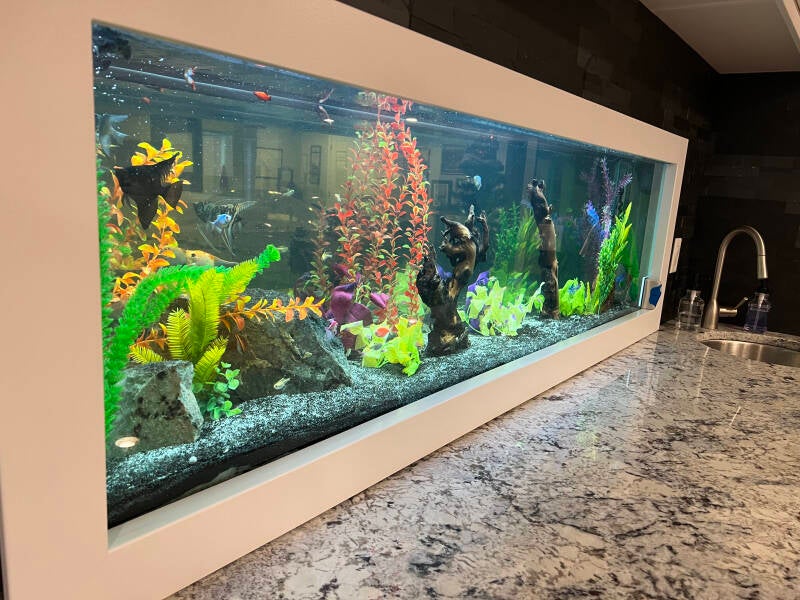
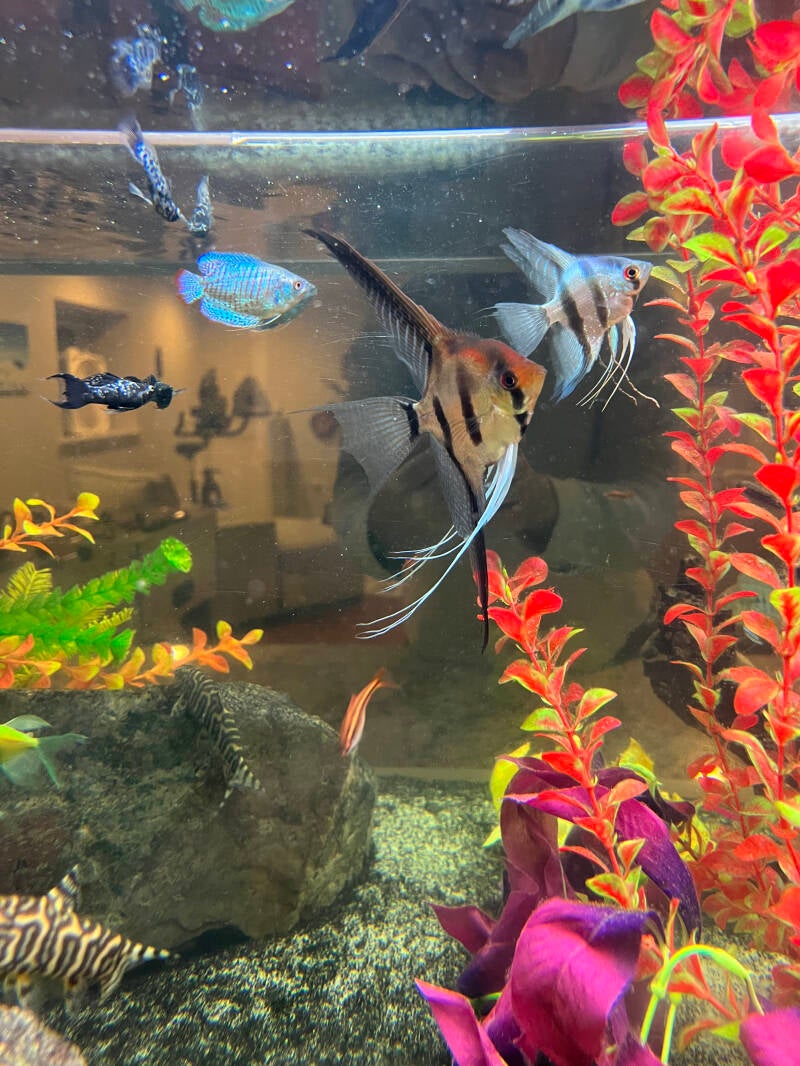
Nothing is more relaxing when showering or doing your business than the peace and serenity of a beautiful aquarium. Right? Most people who build a fish tank into the wall expect it to be visible from one side. That wasn't enough for me, I wanted the aquarium to be attractive from both sides. I needed a retractable door above the tank to make servicing the tank easier. After considering several options, I designed a custom folding door with a track guide near the base of the bottom door panel.
Because of the complexity of the task, I designed everything in Solidworks. In CAD I could be sure that everything would move as expected. A magnet and an adjustable screw for a hard stop ensure the door is pulled shut completely. I did all the carpentry, metal work, and plumbing myself. I even included a hot water supply, which makes the water changes more comfortable for the fish.
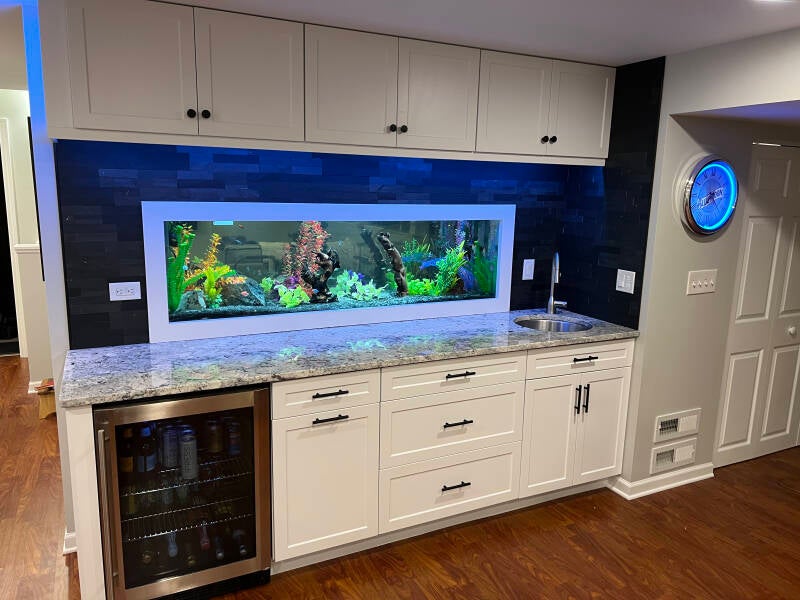
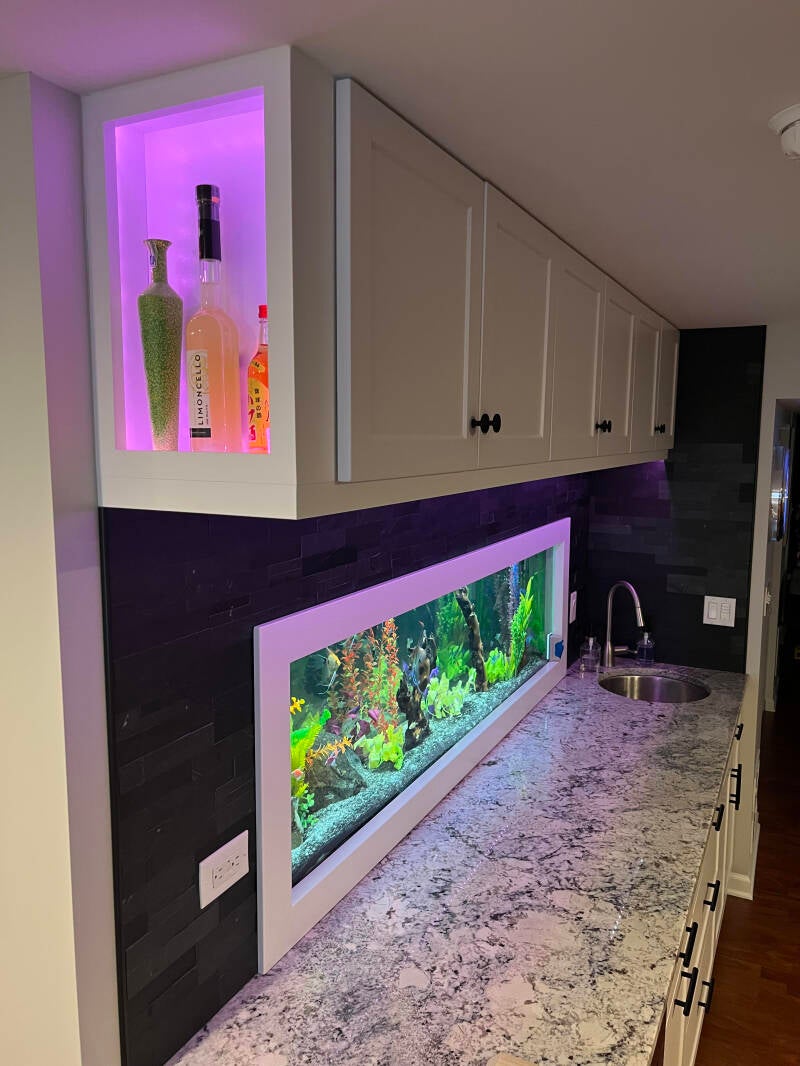
Basement Wet Bar
(Aquarium Phase 2)
My father-in-law and I were painting the basement the day my first child was born. Kids have a way of putting projects on hold, so the wet bar was never completed. Eleven year later it is finally done. This time I used Creo to quickly help with the planning.
Cabinets are from Home Depot, but I modified the sink drawer to wrap around the sink. I custom made the end panel for the fridge. I wanted the top cabinets to be the same width as the counter top so I made a custom "light box" on the end. I wrapped LEDs from under the cabinets to the inside of the box. I also put up the backsplash, which is slate with bits of fool's gold in it.

Basement Game Room
I finally completed this 13-year project in 2022., although the bulk of the work was completed 11 years earlier. With the help of some friends and books about plumbing I did the basement myself. I am most proud of the carpentry, teaching myself plumbing, and the aquarium (see above). Here is a good place for some acknowledgements.
- My brother Dan: All the electrical, getting me started on framing, and some flooring
- Joe Hamilton and Tony Vandiver: Teaching me to mud and putting in a day or two of labor with me
- Tony Vandiver: Teaching me to tile and helping with the bathroom floor
- The drywall team (Mike? Jack? ...): Helping me hang the sheets
- Tom Towne: Paint and a little bit of everything
- The Tucson crew (Mark, Andy, Nate): Ripping and hanging studs to offset the ceiling drywall below the conduit
- Erika Monti: Helping complete the flooring
The best way to view the basement is in a video, enjoy the ride...

The basement after framing and electric was done.
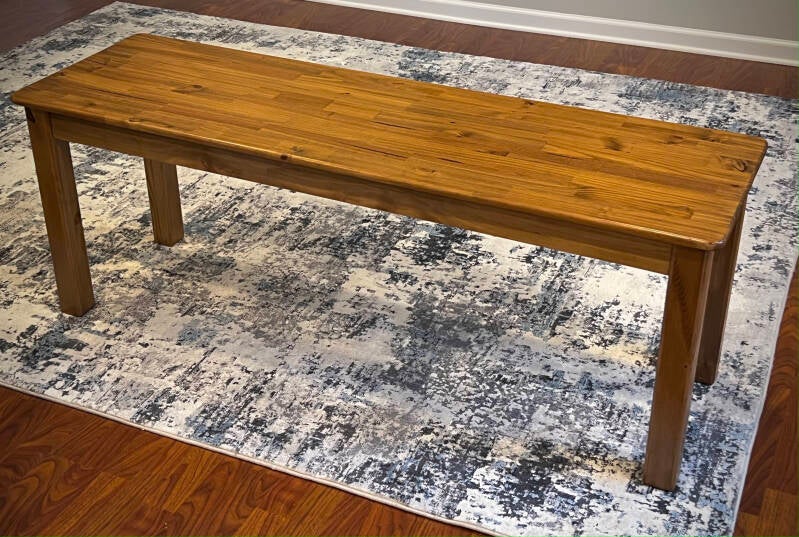
Plant Table
Pine
My mother could not find the table or bench size that she needed so I was called into action. I discovered that building a table from scratch is quite a bit of work; the project consumed several days of my extended winter vacation. It came out well, and she is very happy with it.

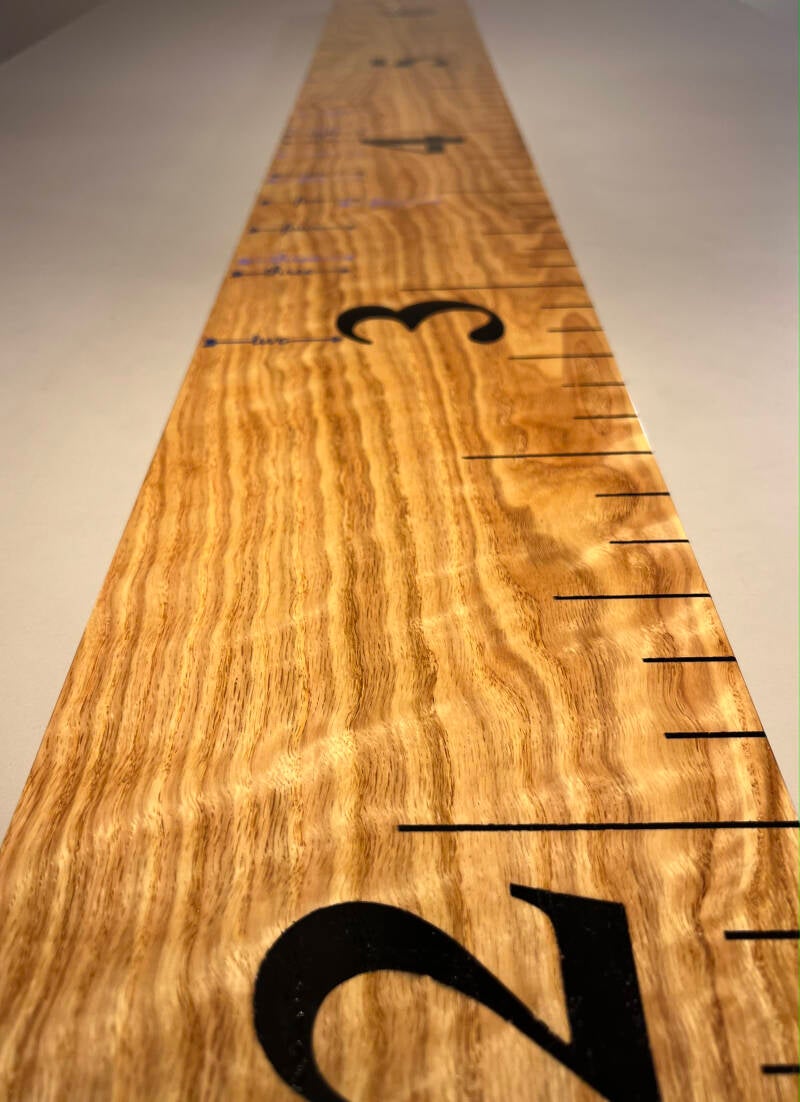
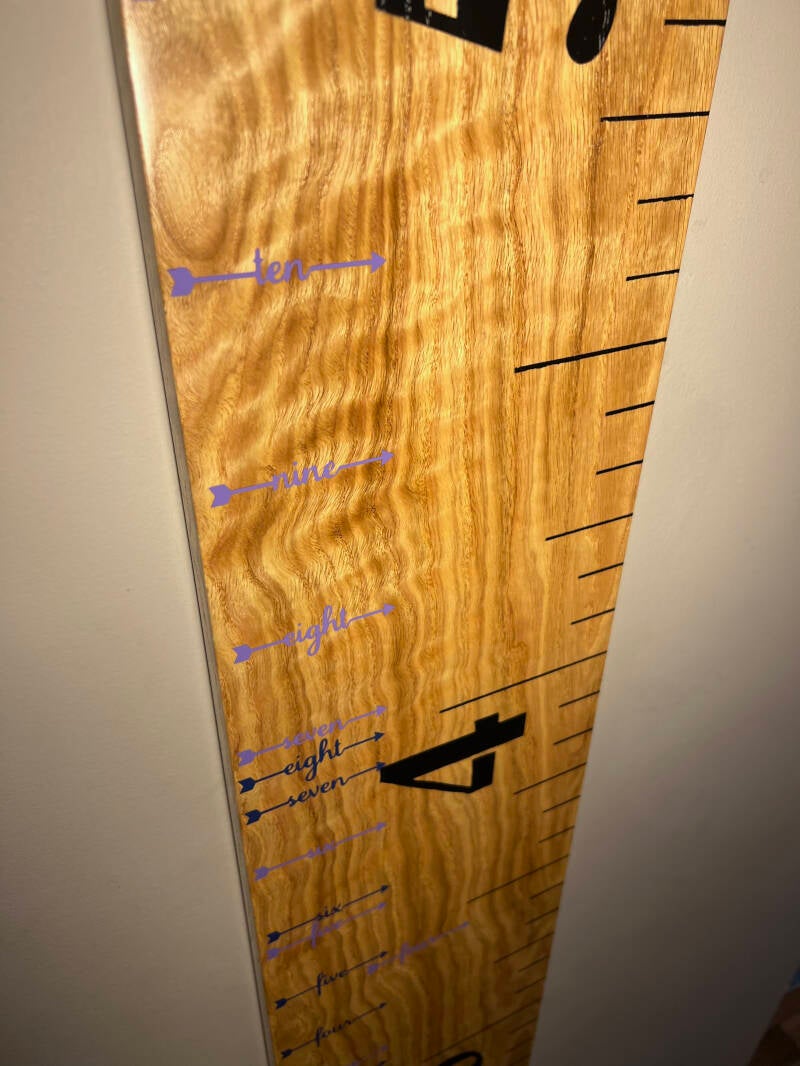
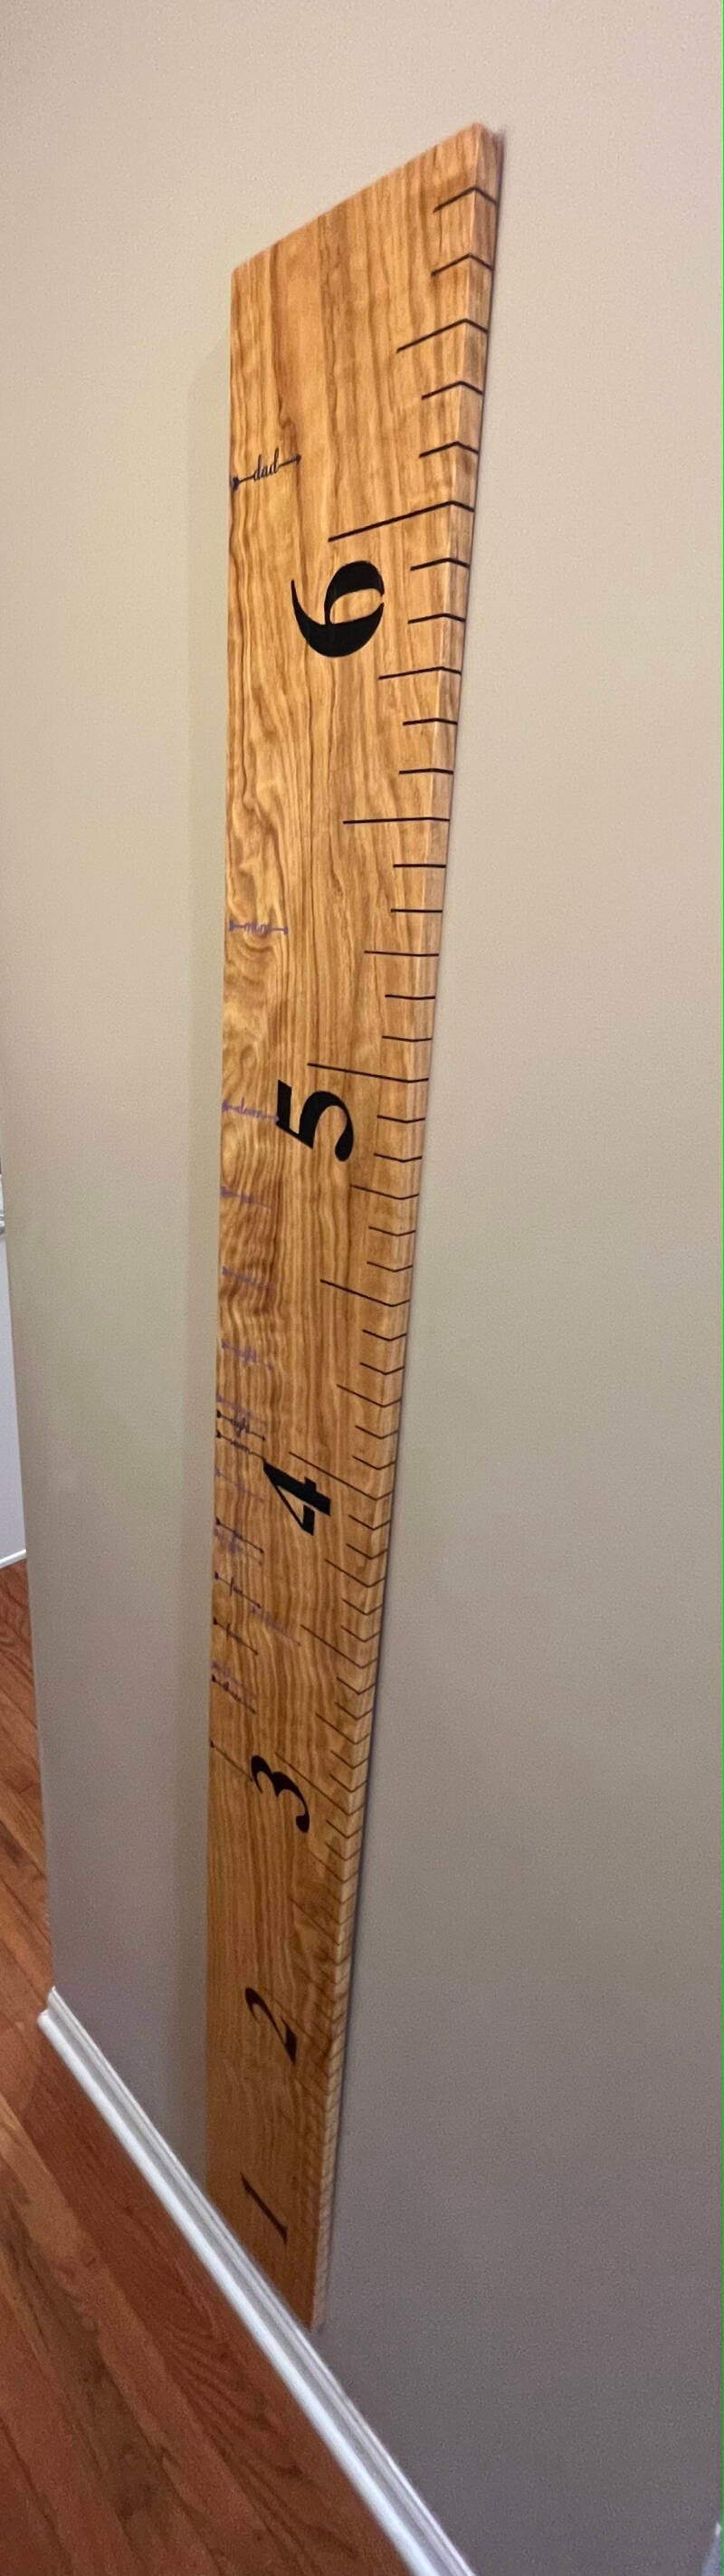
Family Ruler
This is a gift to my wife for Christmas from me and my "third child" Vero. I found this awesome piece of oak at Menards and covered it in about 7 coats of gloss wipe-on polyurethane to show off the chatoyance of the wood. Then we carefully outlined the lines with masking tape and numbers from Hobby Lobby before spraying it with black gloss enamel paint.
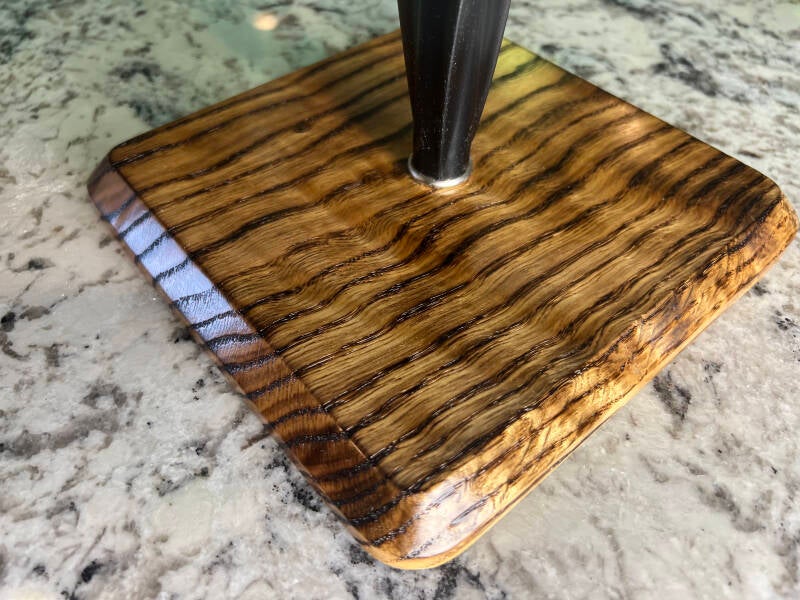
Refurbished Paper Towel Holder
The base of our paper towel holder was all bent and beat up. I was able to recycle the pole in the middle by making a new base for it. I used the same oak that I used for the ruler project. When routing the angled edges I created some burn marks. Normal practice would be to sand the burns off, but I decided to go all-in on the burnt look. I used the torch that I has used 10 years earlier for sweating pipe when plumbing the basement to gently burn the oak. The darker parts of the grain burn much more quickly than the lighter parts, giving the oak a zebra-like appearance.
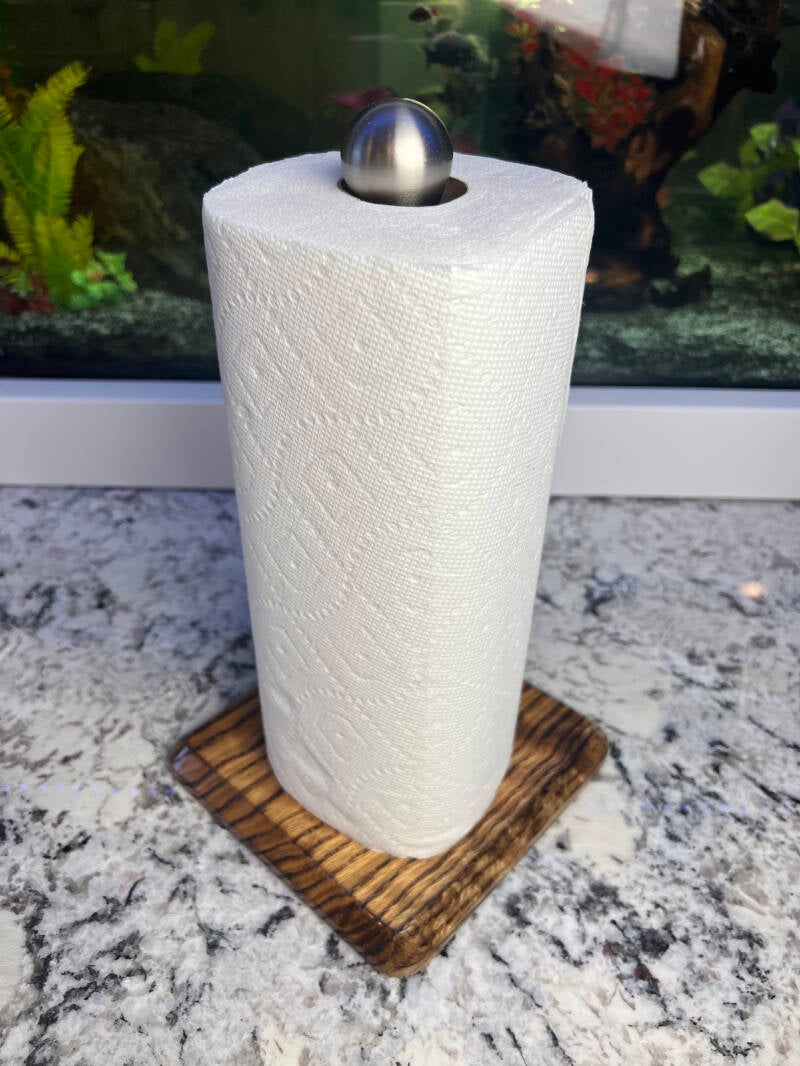
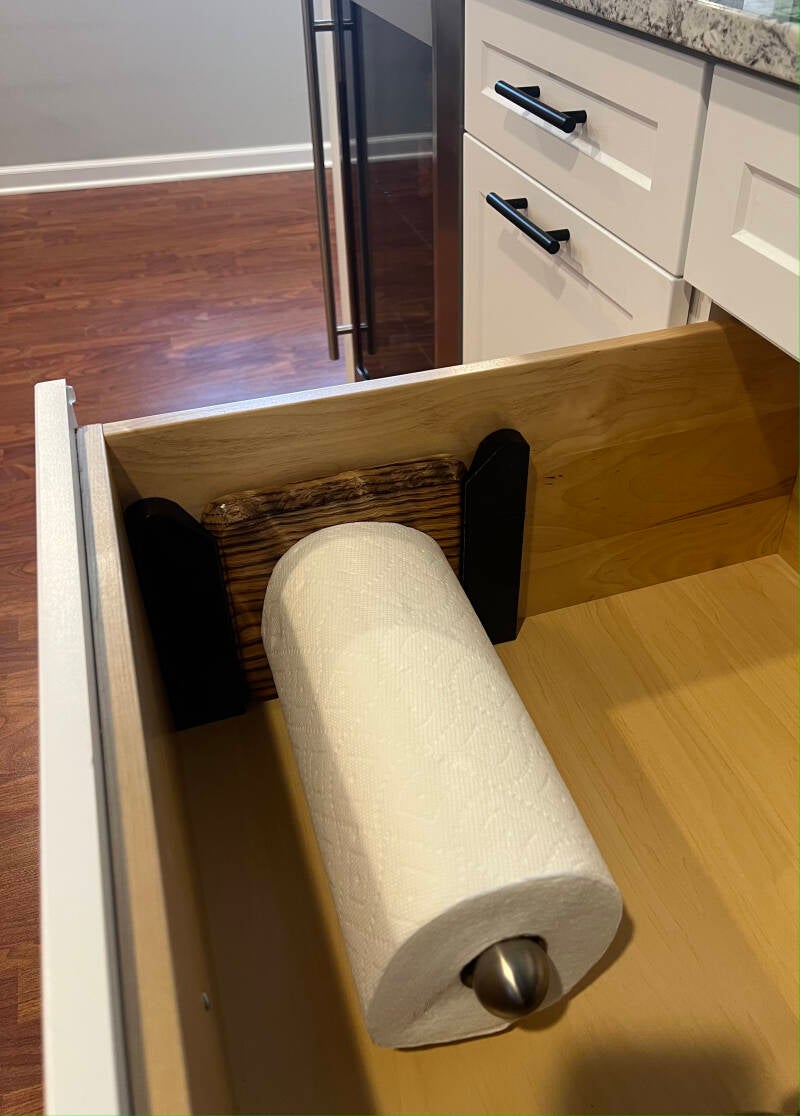
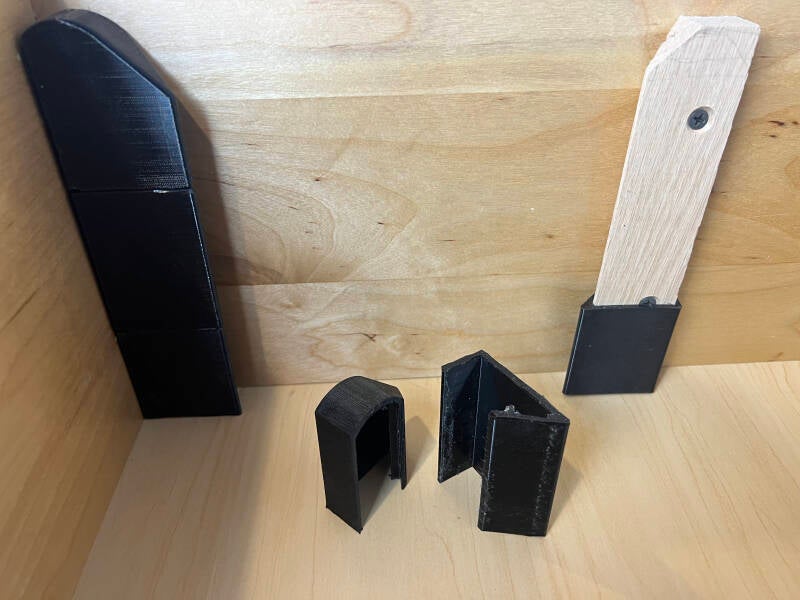
The beveled edges were not just for looks, they were part of a plan to incorporate the base into a drawer. I made a pair of tracks to receive the base so I can easily stash the paper towels away when they are not needed. I didn't want to ruin the finish on the oak base, so I designed soft sleeves that I printed out of TPU. The rubbery sleeves are supported with custom-cut oak. A groove in the wood and a mating ridge in the rubber act to lock the rubber in nicely.
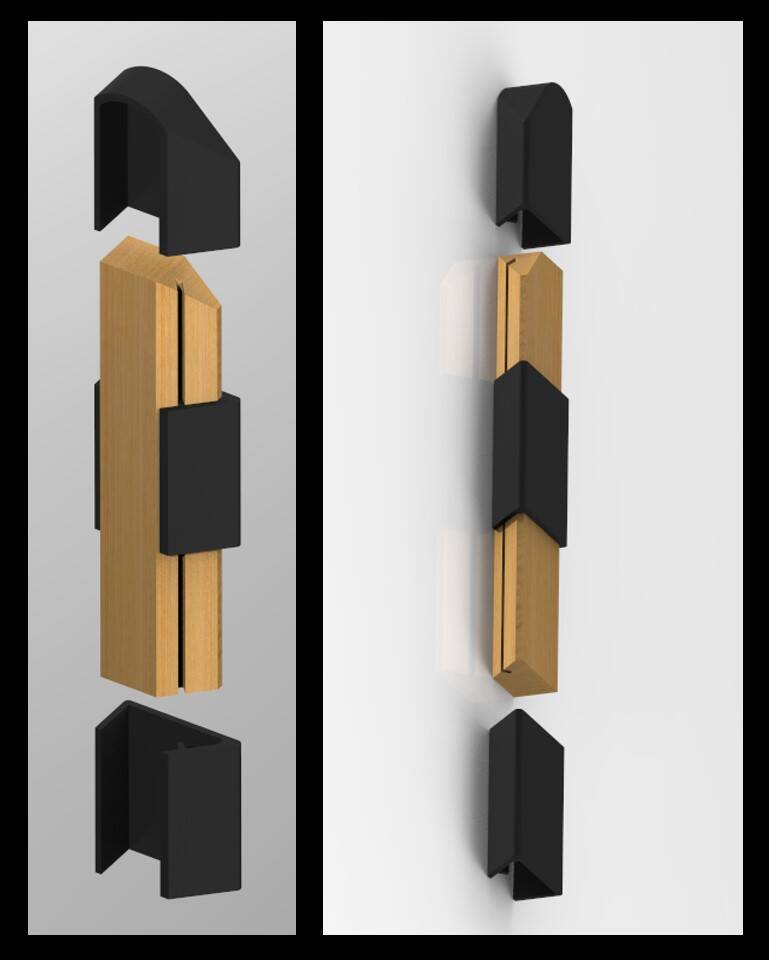
I cut the oak first then designed the sleeves to go over it. I figured 3D printing is more accurate than my wood cutting, so I cut first and printed last. The sleeves are in three pieces to keep the print height reasonable. The CAD work was done in Creo and I included some renderings. This was a bit over-engineered, but it turned out great.
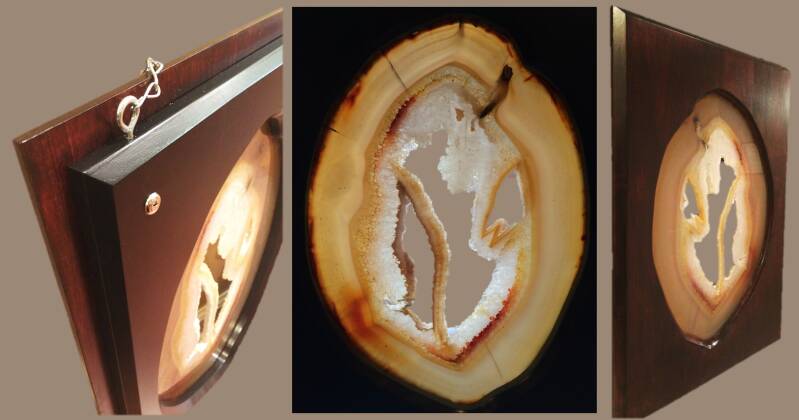
Geode Display Frame
Maple
I lived in Tucson Arizona for 6 years, which gave me the opportunity to visit the world's biggest annual gem, mineral, and fossil show several times. One year I picked up this incredible slice of geode for just $70. I built this frame because I wanted something to protect it and provide back-lighting for the specimen. Originally the frame was part of a light box. Later I switched to a simpler design that I can hang in a window.
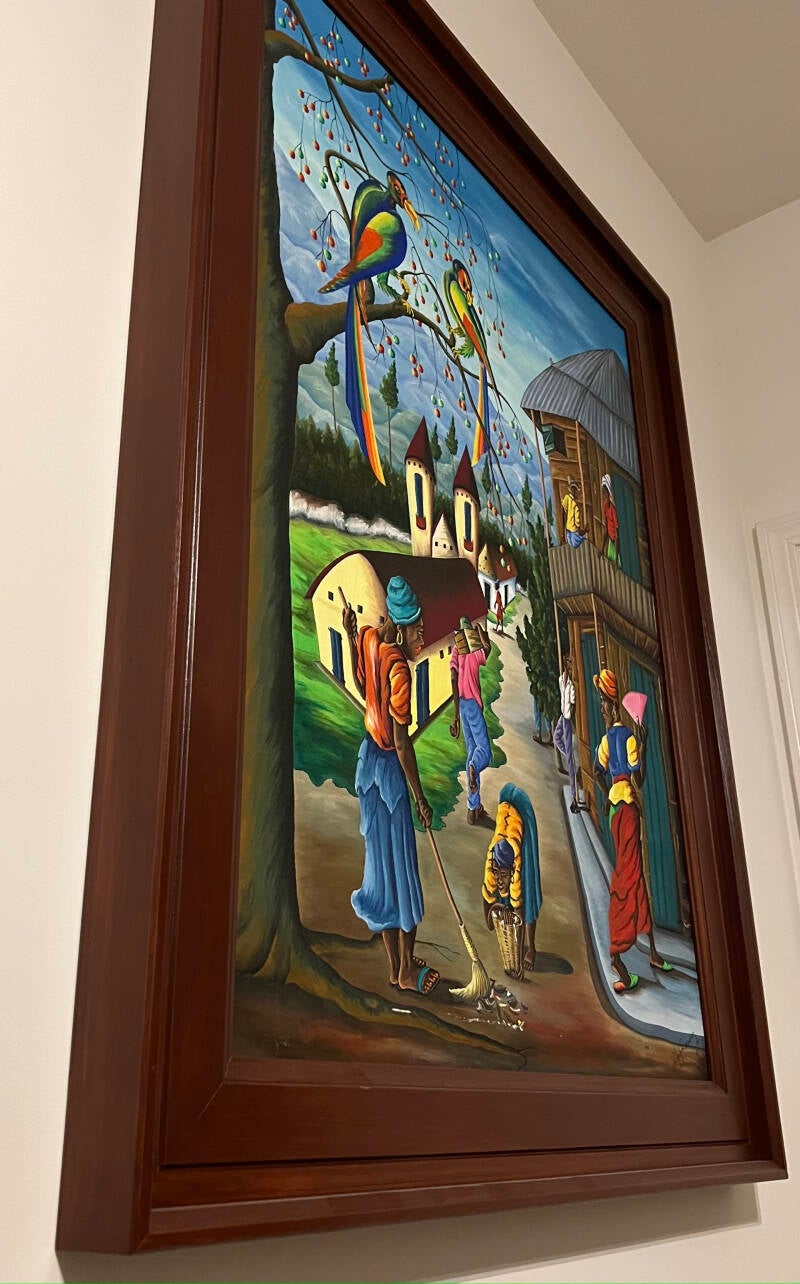
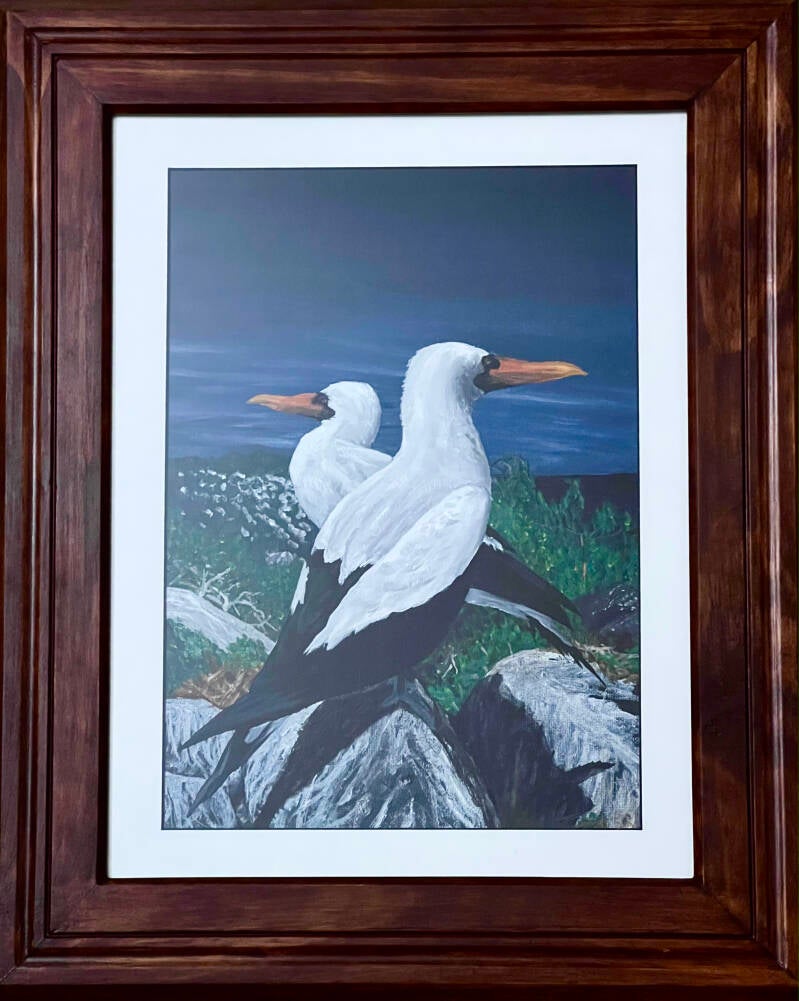
Picture Frames
The only thing more expensive than paying to frame art is spending time to make a frame. I have built several frames despite the time it takes to build and finish frame molding. The picture of the seagulls is one of my paintings from the 1990s. The frame was built around 2010. The much larger painting is one my father purchased from a Haitian art dealer.
Curved Bookshelf
Yet-to-be-built
I found this CAD model that I created several years ago. I like the idea of angled bookshelves so that you don't need book ends. I also love seeing curves in furniture. I would have most likely used the top for plants or ornaments. Curves take a lot of extra work, which is why I have never built this. Feel free to steal my design! Maybe I will get to it someday.


Create Your Own Website With Webador